How to Organize Kitchen Drawers Without Dividers: Simple DIY Storage Ideas
You open the utensil drawer, and it’s the same story every time. Spatulas tangled with whisks, a rogue rubber band, three bottle openers you forgot you owned. Learning how to organize kitchen drawers without dividers isn’t about buying another plastic tray that never quite fits.
It’s about using what’s already sitting around your house to give every item its own spot. By the end of this guide, you’ll have a handful of methods you can start tonight, without spending a dime if you don’t want to.
Why Your Kitchen Drawers Keep Ending Up a Mess
Most cluttered kitchen drawers aren’t a storage problem — they’re a sorting problem. You toss things in without a system, so nothing has a “home,” and everything drifts around every time the drawer opens and closes.
Here’s where most people get stuck: they buy a drawer organizer, and it works for about two weeks. Then someone tosses in a takeout menu or a spare battery, and the whole system falls apart again. The organizer wasn’t the issue. The habit of “just shove it in” was.
A better fix is to decide once what belongs in each drawer and what doesn’t. That one decision does more for cluttered kitchen drawers than any product you could buy.
How to Organize Kitchen Drawers Without Dividers Using Things You Already Own
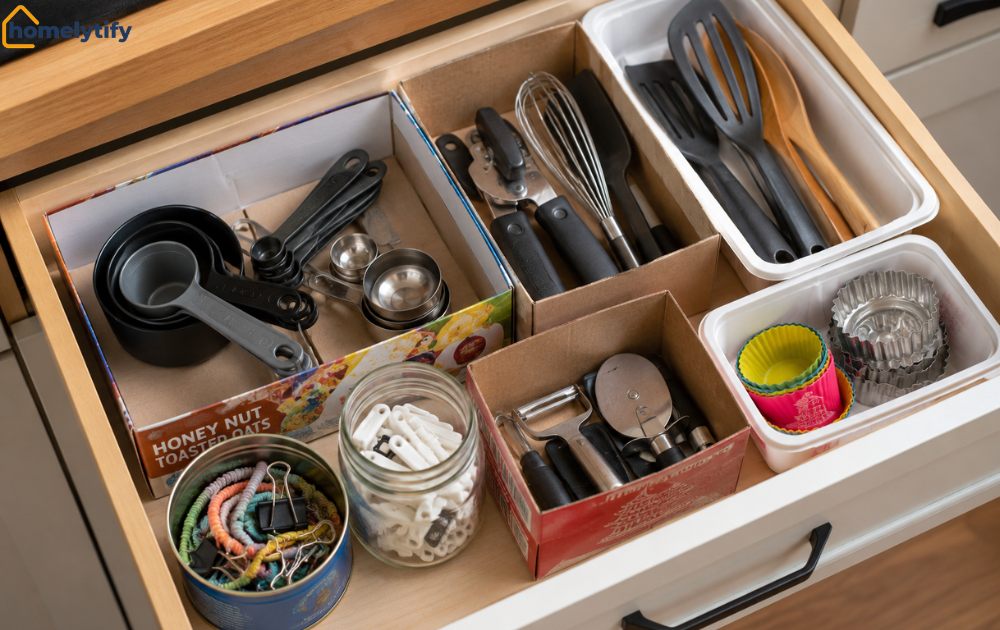
You can organize kitchen drawers without dividers by repurposing boxes, jars, and containers you’d normally toss out — think cereal boxes, small tins, or takeout containers cut down to size. These free stand-ins do the same job as store-bought dividers: they create boundaries so items stop sliding into each other.
This is genuinely my favorite kitchen storage hack because it costs nothing and it’s fast. Grab a few items from your recycling bin before it goes out — you’ll be surprised how many of them are already the right shape.
Cereal and Snack Boxes as Drawer Sections
Cut a cereal box down to about two-thirds the height of your drawer, and you’ve got a rectangular tray. Cut several from different boxes, and you can arrange them like puzzle pieces to fill the whole drawer. The cardboard sounds flimsy, but once it’s wedged between the drawer walls, it barely moves.
Wrap them in leftover contact paper or even packing tape if you want them to survive a spill. This trick works especially well for a junk drawer or a baking tools drawer, where you’ve got a mix of odd-shaped items.
Small Jars, Tins, and Cans for Loose Items
Baby food jars, mint tins, and cleaned-out tuna cans are perfect for corralling small stuff — twist ties, birthday candles, measuring spoons, garlic presses. Lay them on their sides in a drawer, and they stop rolling because they’re wedged against each other or the drawer wall.
I’ve used old candle tins for years to hold loose cutlery, odds and ends, and honestly, they hold up better than some of the cheap plastic bins I’ve bought.
Shoeboxes and Small Gift Boxes for Bulkier Tools
For a deep utensil drawer, a shoebox lid (just the lid, not the whole box) makes a shallow tray that’s perfect for spatulas, tongs, and serving spoons. It keeps them corralled without taking up the full drawer depth, so you can still slide smaller items underneath or beside it.
Can You Organize a Kitchen Drawer Without Buying Anything?
Yes, you can fully organize a kitchen drawer without buying anything by repurposing cardboard boxes, jars, rubber bands, and fabric scraps you already have at home. The goal is creating separation between items, and almost any sturdy household object can do that job just as well as a store-bought divider.
A few no-cost combinations that work well together:
- Cereal box sections for the main utensil drawer
- Rubber bands wrapped around bundles of similar tools (all your measuring spoons together, for example)
- A folded dish towel as a soft base layer so metal tools don’t clang and slide
- Egg cartons (bottom half, lid removed) for tiny items like twist ties, corn holders, or spice packets
None of this needs to look magazine-perfect. It just needs to keep things from turning into a pile again by Thursday.
DIY Drawer Organizer Ideas That Cost Almost Nothing
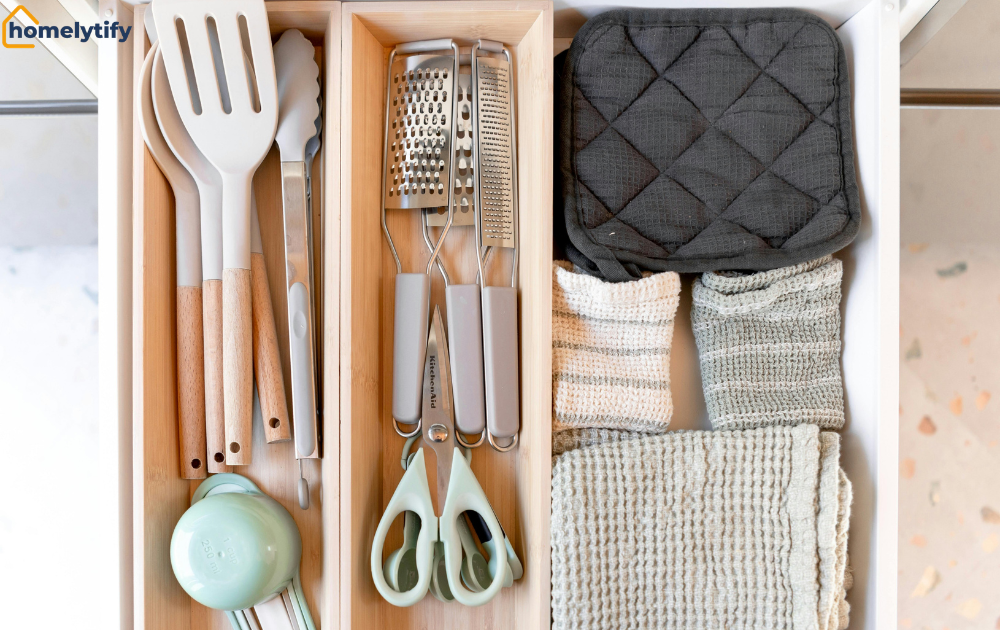
If you want something a little more permanent than repurposed boxes, there are still budget-friendly ways to build your own drawer organizer.
Here’s a step-by-step version using popsicle sticks or thin scrap wood, which holds up far longer than cardboard:
- Empty the drawer completely and group items by type (spatulas, whisks, measuring tools).
- Arrange the groups back in the drawer the way you want them to sit.
- Use a ruler or a stack of books as temporary barriers between groups to test the layout for a day or two.
- Once you’re happy with it, glue popsicle sticks end-to-end into short walls matching those gaps.
- Let the glue set for at least an hour, then place the dividers back in.
This isn’t a weekend project. It’s maybe 20 minutes of work plus drying time, and it gives you a custom layout that a pre-made tray never could, since it’s built around your actual tools instead of a generic size.
I tried this in my own baking drawer after getting fed up with measuring spoons burying themselves under cookie cutters every week. I honestly expected the glued popsicle sticks to snap the first time I yanked the drawer open too fast, but they’ve held up for over a year now with zero repairs. The only thing I’d do differently is measure twice before gluing — my first attempt left one section just slightly too narrow for my largest cookie cutter, and I had to pry it out and redo it.
If woodworking isn’t your thing, thick cardboard tubes (from paper towel rolls, cut into short rings) stood on end work surprisingly well for holding spatulas and whisks upright in a deep drawer — more like a mini utensil crock, just tucked inside the drawer instead of on the counter.
How Do You Keep Items From Sliding Around Without Dividers?
You keep items from sliding by lining the drawer with a non-slip mat or shelf liner and grouping similar tools with rubber bands or twine. Friction and bundling do most of the work that rigid dividers usually handle, and both cost only a few dollars.
A cheap rubber shelf liner — the ribbed, grippy kind sold near the drawer liners at any hardware store — is the single biggest upgrade you can make here. Cut it to fit the drawer bottom and don’t stick it down; the texture itself creates enough grip to stop things from moving. Metal utensils stop skating across the drawer every time it opens, and lightweight plastic tools stay roughly where you put them instead of sliding toward the front every time you pull the drawer open.
A few more tricks that actually hold up over time:
- Bundle nesting items (measuring cups, mixing spoons) with a hair tie so they move as one unit instead of scattering
- Stand tall items like whisks and spatulas in a small mug or cup placed inside the drawer
- Fold a dish towel into a long strip along the back edge of the drawer to stop things from rolling into the gap when it closes
This matters more than people expect. A drawer that’s technically organized but still rattles and slides every time you open it will feel messy again within a week, even if nothing’s actually moved out of place.
Renter-Friendly Storage Tricks for Kitchen Drawers
If you’re renting, drilling, or gluing anything into a drawer, it usually isn’t an option, and that rules out a lot of “DIY drawer organizer” tutorials floating around online. The good news is that almost everything above already avoids permanent changes.
Cereal box trays, jar bundles, and shelf liners all lift straight out at move-out time without leaving a mark. That makes them genuinely better for apartment dwellers than screwed-in wood dividers, not just a fallback option.
One trick that’s specifically useful for renters: use tension rods (the small spring-loaded kind sold for cabinet doors) laid sideways across a drawer to split it into two rows. No adhesive, no tools, and they come out in seconds if you move.
Common Mistakes When Organizing Kitchen Drawers Without Dividers
Even with good intentions, a few habits quietly undo all this effort. Here’s what usually goes wrong.
Mistake 1: Organizing before decluttering. People jump straight to building sections without first removing duplicate tools or things they never use. You end up building a beautiful home for a potato masher you haven’t touched in two years. Pull everything out first, and only put back what you actually use.
Mistake 2: Using containers that are too tall for the drawer. A jar or box that’s taller than the drawer depth will jam the drawer or get crushed shut. Measure the drawer’s interior height before repurposing anything, not just the width.
Mistake 3: Skipping the non-slip layer. This is where things usually fall apart — literally. Without any friction on the drawer bottom, even well-sorted sections slide into each other within days. A $5 roll of shelf liner solves most of this on its own.
Mistake 4: Mixing categories that don’t belong together. Cooking utensils and junk-drawer items (batteries, tape, receipts) end up in the same space because “there was room.” Keep function-based zones separate, even if one drawer has extra space — that space is fine to leave empty.
Mistake 5: Not accounting for how the drawer actually gets used. Some drawers get opened ten times during one meal prep. If your most-used tools are buried under less-used ones, you’ll dig through the whole drawer daily. Put daily tools in the top layer or nearest the front.
Conclusion
Organizing kitchen drawers without dividers really comes down to two things: giving every item a defined spot, and adding enough friction so that spot sticks. Cereal boxes, jars, rubber shelf liner, and a bit of sorting will get you further than most store-bought organizers ever do, and none of it requires a trip to the store or a drill.
Pick one drawer today — the one that bothers you most — and try just one of these ideas. Once you see how much calmer it feels to open it, the rest of the kitchen tends to follow.
Frequently Asked Questions
What can I use instead of drawer dividers?
Cereal boxes, small jars, tin cans, shoebox lids, and rubber bands all work as free substitutes for store-bought dividers.
How do I stop utensils from sliding in a drawer without dividers?
Line the drawer with a non-slip shelf liner and bundle similar tools together with rubber bands or hair ties.
Is it cheaper to organize a drawer without buying organizers?
Yes. Repurposed household items cost nothing, while pre-made drawer organizers typically run $10 to $40 per drawer.
Can I organize kitchen drawers without dividers if I’m renting?
Yes. Non-permanent options like shelf liner, tension rods, and cardboard trays lift out easily and leave no marks.
How often should I reorganize my kitchen drawers?
A quick check every two to three months is enough to catch clutter creep before it turns into a full mess again.