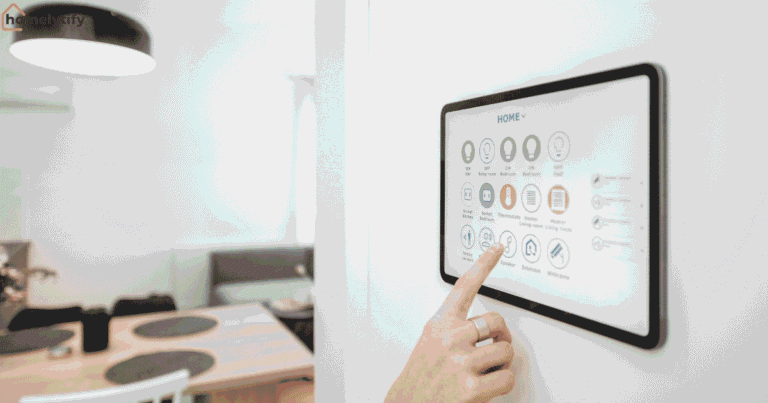
How to Organize a Small Kitchen in an Apartment (Space-Saving Ideas That Actually Work)
You’re trying to organize a small kitchen, but every time you open a cabinet, something falls out or gets in your way. You move one thing to create space, and somehow the mess just shifts somewhere else instead of improving.
This is apartment kitchen life when the space was never designed to function well. The frustration isn’t really about being disorganized. It’s about working in a kitchen with limited storage, no real system, and no thought given to how people actually cook day-to-day.
Most small kitchen organization advice online shows perfectly staged kitchens with matching containers and empty counters. That’s not reality. Real apartment kitchens have tight cabinets, no pantry, one stubborn drawer, and counter space that disappears instantly the moment you start cooking.
This guide is written for that reality. Every idea here is practical, low-cost where possible, and focused on helping you organize a small kitchen in a way that actually works in real life.
By the end, you’ll have a clear, step-by-step system to make your kitchen functional instead of frustrating.
Why Organizing a Small Kitchen Feels Hard (And What Most People Miss)
The reason small apartment kitchens feel chaotic isn’t just the size. It’s the combination of limited storage and the absence of proper built-in systems.
Most apartment kitchens are designed to look acceptable, not actually to function well. Cabinets are placed without much logic, counter space disappears the moment you own more than a few basic items, and there’s usually no pantry.
In many cases, you’re left with minimal drawers, some of which don’t even work properly.
The real issue isn’t that the kitchen is too small. It’s that it’s holding more than its actual capacity can handle.
When a small kitchen contains only what truly belongs there, essential tools, necessary food, and no extra clutter, it can work surprisingly well. The same space filled with unused or “just in case” items quickly becomes overwhelming.
- Small kitchens struggle due to poor design and a lack of systems
- Storage is limited and often not logically planned
- Counter space disappears quickly with even basic items
- Many kitchens lack a pantry and a proper drawer structure
- Overloading the space is the real cause of chaos, not size alone
Another important point people miss is that small kitchens require more intentional organization, not less. Every item needs a clear, assigned place. Each cabinet must justify what it holds. There is no room for random placement or “temporary” storage decisions.
Once you accept this rule, the entire approach changes. A small kitchen stops being a problem of space and becomes a problem of decisions on what stays, what goes, and where everything belongs.
Why Small Kitchens Feel Impossible to Organize
Start with food, not with storage. That’s the counterintuitive move that most people skip.
Before touching a single cabinet organizer or storage solution, pull everything out of your cabinets and off your counters. Then deal with what you actually have.
Most small apartment kitchens contain expired canned goods, duplicate tools, appliances used only twice a year, and food products bought for one recipe and never used again.
Clear the Food First
Check every expiration date. Toss what’s expired without guilt; it’s not saving money to keep food you’ll never eat. Combine any partially used items where possible. Three half-empty bottles of soy sauce become one. Two bags of rice get consolidated.
Then ask: how much food does this kitchen realistically need to hold for your household? Most people are storing a month’s worth of food in a kitchen designed for a week’s worth. Reducing your food inventory to what you’ll actually use in two weeks solves more storage problems than any organizer you could buy.
Edit the Tools Next
Pull out every kitchen tool and be honest. How many spatulas do you need? One or two. How many wooden spoons? Two at most. If you have seven, six of them are taking up space without contributing anything.
Specialty tools are the biggest offenders. The avocado slicer. The Apple Corner. The mandoline you’ve used once. These items take up drawer and cabinet space that your daily tools need. If a tool serves one very narrow purpose and you use it less than once a month, it probably doesn’t earn a spot in a small kitchen.
Appliances Are Where Most People Avoid the Truth
Look at every countertop and cabinet appliance with real honesty. The air fryer you use three times a week belongs. The bread maker you haven’t touched in eight months probably doesn’t, at least not inside the kitchen.
A small home might have a storage closet or under-bed space where rarely used appliances can live. If there’s genuinely nowhere else, that’s a different problem. But most of the time, appliances are kept in the kitchen by default, not by necessity.
How to Organize a Small Kitchen Step by Step Without Getting Overwhelmed
Organize one zone at a time. Don’t pull everything out of every cabinet at once, which creates a larger mess than you started with and usually ends in things being put back randomly because you ran out of energy.
Step-by-Step Method for Organizing a Small Kitchen
Step one: Start with the cabinet or drawer that bothers you most. That’s almost always the one you open and close twelve times a day with diminishing patience. Fix that one first.
Step two: Empty it. Clean it. Then think about what should logically live there based on what you do nearby. The cabinet above the coffee maker should hold coffee and mugs. The cabinet nearest the stove should hold cooking tools and spices. If it currently holds random things that ended up there without a plan, that’s the first thing to fix.
The mistake I see most often is people trying to “improve” the organization without fully resetting the space first. What actually works is starting from an empty cabinet, so every item has to earn its place again.
Step three: Put back only what belongs. Leave what doesn’t belong on the counter temporarily and find it a proper home after you’re done with this zone.
Step four: Move to the next zone. Do this over a few days, not one marathon session. A small kitchen organized in stages stays organized. A kitchen reorganized in an exhausted weekend frenzy usually reverts within two weeks.
The “Use What You Have” Method: Organizing Without Buying Storage Products
Here’s where most people get stuck: they think they need to buy organization products before they can get organized. That assumption is backwards.
Why You Don’t Need Storage Products to Start Organizing
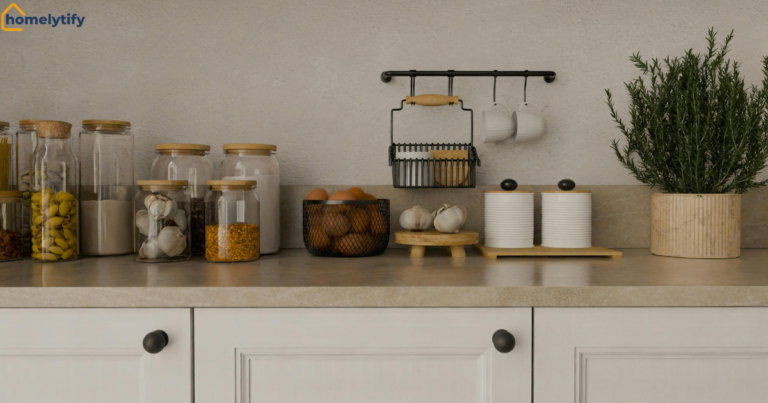
Before spending anything, first look at what you already own that can work as storage. Most kitchens already contain more usable organizing tools than people realize.
Shoeboxes can line cabinet shelves and stop items from sliding around. Mugs can hold pens, scissors, or small kitchen tools on the counter. A baking dish placed upright can store cutting boards and sheet pans vertically, saving an entire shelf compared to stacking them flat.
- Shoeboxes create instant cabinet dividers
- Mugs double as holders for small tools
- Baking dishes can store trays and boards vertically
- Empty jars can become pantry storage containers
- Wine bottles can be used for organized side storage
- Tension rods under the sink can create a second level for bottles
How to Build Storage Using What You Already Own
The method is simple: identify what you need to store, then scan what you already have before thinking about buying anything. In many cases, half of your storage problems already have free solutions sitting inside your kitchen.
When You Actually Should Buy Storage Items
This approach also exposes the real issue quickly. If you cannot solve a storage problem with what you already own, and a product genuinely fixes it, then buy one specific item for that one problem.
Not a full matching set. Not something chosen based on aesthetics. Just one practical solution for a real gap in your system.
- Only buy after identifying a real storage gap
- Avoid buying full sets or unnecessary matching containers
- Focus on solving one problem at a time
- Keep purchases functional, not decorative
The goal isn’t to avoid buying things completely. It’s to stop using shopping as a substitute for thinking.
How to Maximize Vertical Space When You’ve Run Out of Cabinets
Most people look left and right when they run out of storage. Look up instead.
The wall space above your existing cabinets, the wall beside your refrigerator, and the space above the window are almost always empty in small apartment kitchens, and they represent real, usable storage that most renters ignore because they assume they can’t use it.
Use the Space Above Cabinets
The top of your cabinets can hold items used infrequently, such as a large pot used for holiday cooking, extra paper goods, and rarely used appliances.
The items aren’t accessible daily, which is fine, because they don’t need to be. Stack items in baskets or boxes up there so they’re contained and not collecting dust in a disorganized pile.
Mount a Magnetic Knife Strip on the Wall

A magnetic knife strip on the wall above or beside your prep area removes knives from the counter and from a knife block, taking up counter real estate.
It’s one of the most space-efficient kitchen decisions you can make. If your lease prohibits wall mounting, there are strip options that adhere without drilling and hold surprising weight.
Add a Wall-Mounted Shelf or Spice Rack
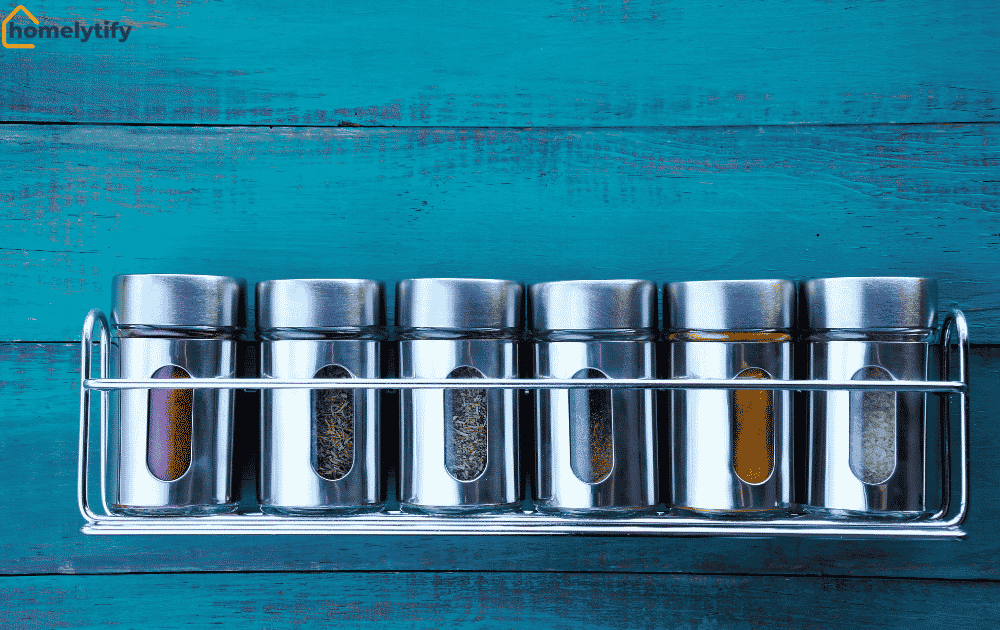
A single floating shelf in an apartment kitchen, even a narrow one mounted at eye level above the counter, creates real storage for spices, oils, and vinegars.
It also holds daily-use items that would otherwise crowd the counter. A narrow shelf doesn’t interrupt the kitchen visually and adds several feet of functional space.
Use the Refrigerator as a Storage Surface
The top of the refrigerator is flat, stable, and usually empty. It can hold a basket of fruit, a bread box, cereal boxes, or a small appliance. The side of a refrigerator, if it’s a magnet-compatible surface, can hold a magnetic spice rack, a paper towel holder, or magnetic containers.
Smart Zoning: How to Create Functional Areas in a One-Wall Kitchen
Zoning a small kitchen means deciding what happens where and making sure everything needed for that task lives in that zone.
Most small apartment kitchens have three functional zones, even if they don’t look like it: prep, cooking, and cleaning. Prep happens where you have counter space.
Cooking happens at the stove. Cleaning happens at the sink. The goal is to store everything for each task as close to where it’s used as possible.
The Prep Zone
The cabinet or drawer closest to your main prep area should hold knives, cutting boards, mixing bowls, and the tools you reach for when you’re getting ready to cook.
If your prep items are stored on the other side of the kitchen, you lose steps every single time you cook. That daily friction accumulates into a kitchen that feels more difficult to work in than it needs to be.
The Cooking Zone
Items nearest the stove should be cooking-related: pots, pans, cooking utensils, oil, salt, and the spices you reach for most often.
This is where a wall-mounted spice rack or a counter-level spice organizer pays off, not tucked away in a cabinet across the kitchen.
The Cleaning Zone
Under the sink and the cabinet nearest the sink should hold dish soap, sponges, cleaning spray, trash bags, and anything else related to washing up.
Most people have cleaning supplies scattered across the kitchen. Centralizing them in one zone means you stop searching for what you need every time.
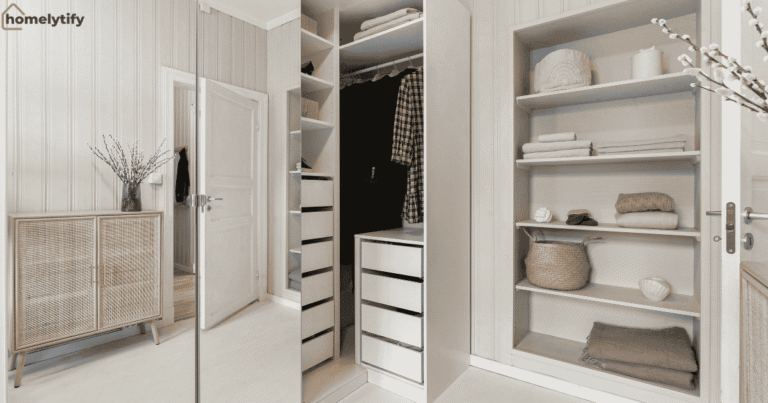
Where Do You Put Everything When There’s No Pantry?
No pantry is the most common complaint in small apartment kitchens, and the honest answer is that you create pantry space from what you have.
A bookshelf or a small freestanding cabinet placed in an adjacent area functions as a pantry. This could be the end of a hallway, a dining room corner, or a small utility space.
It holds dry goods, canned goods, extra paper products, and anything that doesn’t need to be inside the kitchen itself. This isn’t a compromise. It’s a practical solution that many apartment dwellers use, and that works reliably.
I realized this after trying to make a tiny apartment kitchen work for months. Every cabinet was stuffed, and nothing felt organized, no matter what I tried. The moment I moved dry goods and extra pantry items to a small shelf in the hallway, the kitchen finally started functioning. That one decision freed up more cabinet space than any organizer I had ever bought.
Inside the kitchen, a dedicated pantry cabinet can be created by designating one cabinet exclusively for food storage and keeping it organized by category. Canned goods on one shelf. Dry goods on another.
Snacks on another. Label the shelves if that helps. The label isn’t for aesthetics; it’s so that items go back to their correct location without thinking.
An over-the-door organizer on a pantry door or on the back of a cabinet door adds shelves of storage without taking any floor or wall space. These organizers work well for spices, snack bags, foil and wrap boxes, and small items that otherwise clutter shelves.
Most small apartment kitchen cabinets are organized by default, and things end up in them randomly and stay there. Reorganizing them by function and frequency of use changes how the whole kitchen works.
Core Principles for Better Kitchen Cabinet Organization
The first principle: most-used items at the front, least-used at the back. This sounds obvious, but most people have their everyday glasses behind three rarely used items.
Those items have to be moved every single time. Stop doing that.
The second principle: create levels inside your cabinets. A cabinet with one flat shelf used to hold one layer of items is wasting the vertical space inside.
Stackable shelf risers create a second level within a single cabinet. Plates on the bottom shelf, smaller plates or bowls on the riser above. Glasses on the main shelf, mugs on the riser. You double your usable cabinet space without adding anything from outside.
The third principle: group everything that belongs together. All the baking supplies in one cabinet. All the glasses and mugs together. All the food storage containers with their lids. When everything in a cabinet serves the same purpose, you stop opening the wrong cabinet reflexively and stop finding one item scattered across three locations.
What’s the Best Way to Store Pots, Pans, and Lids in Tight Spaces?
Pots and pans are the hardest things to store in a small kitchen because they’re large, oddly shaped, and resist stacking efficiently.
The most space-efficient solution is vertical storage. A pot rack, either ceiling-mounted or wall-mounted, keeps pots and pans accessible and completely off cabinet and counter space.
If your lease prevents wall mounting, a freestanding pot rack that sits on the counter or floor achieves the same result.
If you’re storing pots in a cabinet, nest them inside each other by size and store lids separately. A vertical file organizer or a tension rod placed vertically inside a cabinet creates individual slots for lids.
Instead of a pile of lids that avalanches every time you open the door, each lid stands vertically and pulls out individually.
Cast iron and heavy pans that don’t nest well can be stored in the oven when the oven isn’t in use, a common practice that works reliably as long as you remember they’re there before preheating.
How to Keep Countertops Clear in a Kitchen That Has No Space
The counter is your workspace. When it’s covered, you have no kitchen. Everything not actively used for food prep should come off the counter.
The test for what stays is simple: do you use this item every single day? If yes, it can live on the counter. If not, it needs a cabinet, a shelf, or a different room.
Most people keep too many things on the counter because they don’t have a home for them anywhere else. That’s a storage problem to solve, not a counter problem to accept. Finding a home for those items in a cabinet, on a shelf, or in another room is the work that has to happen.
A dish rack is the one counter item that causes the most ongoing debate in small kitchens. If you have a dishwasher, the dish rack probably doesn’t need to live permanently on the counter.
If you hand-wash everything, a collapsible dish rack that lives in a cabinet and comes out only when in use recovers meaningful counter space without changing your habits significantly.
Small Kitchen Storage Hacks That Actually Work
Some hacks look good in photos and work terribly in real kitchens. Here are the ones that hold up.
Tension rod under the sink: Place a tension rod horizontally inside the cabinet under your sink. Hang spray bottles by their triggers from the rod.
The floor space under the rod becomes available for other items. This single change can double what your under-sink cabinet holds.
Binder clips on shelf edges: Clip binder clips to the edge of a cabinet shelf to create individual bag holders for plastic bags, trash bags, or zip-lock storage bags.
It’s not glamorous, but it keeps bags from becoming a tangled mess.
Use the inside of cabinet doors: The back of a cabinet door is flat, unused space. Adhesive hooks or a slim over-the-door organizer on the inside of a base cabinet door hold cutting boards, pot lids, or measuring cups. No drilling required for adhesive options.
Stack with shelf risers: A simple wire shelf riser inside any cabinet creates two levels where one existed. Works for plates, glasses, canned goods, or pantry items. Under ten dollars and immediately effective.
Clear bins for the refrigerator: Grouping refrigerator contents in clear bins by category (dairy, leftovers, drinks) prevents items from hiding in the back and getting forgotten.
It also makes the refrigerator easier to clean because the bins pull out completely.
A rolling cart: A small rolling cart bought secondhand adds counter space and storage that can move out of the way when not needed.
For small apartment kitchens with minimal fixed counter space, this is one of the few things worth spending money on.
What Are the Most Common Small Kitchen Organization Mistakes?
Most small kitchens feel cluttered long before people realize they actually have too much stuff, not too little storage.
In that state, the instinct is to start buying organizers to “fix” the problem quickly. But that approach usually adds structure to clutter instead of removing it first.
Buying Organizers Before Decluttering
This is the most expensive and least effective mistake. Buying bins, racks, and organizers for a kitchen that still holds too many things doesn’t solve the problem; it contains it temporarily.
Six months later, the organizers are full, and the kitchen is back to feeling chaotic.
Declutter to a manageable volume first. Then buy storage for what’s left, only where a free solution doesn’t exist.
Organizing by Category Instead of by Use Location
Most people organize kitchens the way a store would stock shelves: all the baking items together, all the spices together, all the cooking tools together. That works for a large kitchen with designated zones. In a small kitchen, it means walking across the space repeatedly for items you use together.
Organize by where you’ll use items, not just what they are. Baking items can be together if you bake in one spot. But if you mix batter on the left counter and bake in the oven on the right, split the baking storage accordingly.
Keeping Appliances on the Counter Out of Habit
The toaster, the coffee maker, the blender, the air fryer, these appliances feel permanent on the counter because that’s where they landed when they were bought. But in a small kitchen, counter space is your most valuable resource.
Evaluate each appliance by daily use. If it’s used every morning, it earns counter space. If it’s used twice a week, it can live in a cabinet and come out when needed. The extra thirty seconds of retrieving it is worth the counter space recovered.
Ignoring the Space Inside Cabinet Doors and Above Cabinets
Most people use only the interior shelves of their cabinets and ignore the door, the space above the cabinet, and the space at the very top of tall cabinets. In a small apartment kitchen, these spaces represent real, usable storage that costs nothing extra to access.
Trying to Organize Everything in One Session
A small kitchen organized in one long, exhausting afternoon usually ends up with things put back randomly because energy ran out. Things that were meant to have a home end up in the nearest available spot.
Organize in short, focused sessions, one cabinet at a time, one zone at a time. The result is a more considered system that actually reflects how you cook and use the space.
How to Organize a Small Kitchen With Too Many Appliances
Too many appliances in a small kitchen is a decision problem before it’s a storage problem. The appliances are there because no one has decided which ones actually earn their spot.
Start with a straightforward audit. List every appliance you own. Next to each one, write how often you use it honestly: daily, weekly, monthly, or rarely. Daily-use appliances earn counter space.
Weekly use appliances live in an accessible cabinet. Monthly or rarely used appliances should be stored outside the kitchen entirely, in a closet, under a bed, or in storage or reconsidered for whether they need to stay at all.
For appliances that stay in the kitchen, think about storage vertically. Appliances that nest or stack a food processor with its bowl inside it, a stand mixer with the bowl nested, take up less space than appliances stored with their parts scattered.
A small appliance garage, a corner cabinet with a roll-up door, or simply a lower cabinet with a dedicated appliance shelf keeps appliances accessible without having them visible on the counter.
What Should Stay on the Counter and What Should Be Hidden?
Counter space in a small kitchen is too valuable to use as default storage. Only earn-it items stay out.
Things that earn counter space: items used every single day without exception. A coffee maker is used every morning. A toaster is used daily. A fruit bowl, if you eat fruit daily, and it genuinely belongs on the counter rather than in the refrigerator.
Things that don’t earn counter space despite usually living there: the dish rack (if you have a dishwasher or can use a collapsible one), the knife block (a magnetic wall strip is better), small appliances used a few times a week, decorative items that serve no function, and paper towel holders that could mount under a cabinet instead.
The question to ask about every counter item: if this weren’t here, would I miss it enough to go get it from a cabinet? For most things, the honest answer is no, not really.
Budget-Friendly Storage Ideas for Renters Who Can’t Drill or Renovate
Being a renter means you can’t permanently alter the walls, which rules out a lot of conventional storage advice. But it opens up more options than most people realize.
Command hooks and strips are the most versatile renter-friendly storage tools available. They hold surprising weight, work on most surfaces, and remove cleanly. Use them on walls, the inside of cabinet doors, on the side of the refrigerator, and on the backsplash. Check weight ratings and stay within them.
Tension rods require no drilling and work between two surfaces inside cabinet doors.
They can also be placed between the walls under the sink or inside a cabinet to create a lid holder. They’re inexpensive and infinitely adjustable.
Freestanding shelves placed in any available spot against a wall, in a corner, beside the refrigerator, if there’s a gap, add storage without touching the structure.
A slim freestanding shelving unit that fits in a twelve-inch gap beside a refrigerator can hold an entire pantry’s worth of items.
Over-the-door organizers hang from any door and require no drilling. They work on pantry doors, cabinet doors, or even the back of a room door adjacent to the kitchen.
Furniture that doubles as storage, a small rolling cart, a kitchen island on wheels, a bar cart repurposed as a pantry shelf, adds functional storage without any permanent installation.
How to Use Drawers Efficiently Instead of Letting Them Become Junk Zones
Every kitchen drawer that becomes a junk zone started as a drawer with no designated purpose. Without a clear purpose, a drawer fills with whatever doesn’t have a home anywhere else.
Fix this by assigning each drawer a specific category before putting anything in it. The top drawer nearest the stove is for cooking utensils only.
The drawer nearest the prep counter is for knives, peelers, and prep tools. The wide shallow drawer is for measuring tools and small gadgets. Decide the purpose first, then fill in accordingly.
Inside each drawer, dividers are worth using because they maintain the organization passively. Without dividers, items slide around, and the drawer gradually returns to chaos regardless of how well you organized it initially.
Simple bamboo dividers or adjustable plastic ones work fine. Or use small boxes and containers from elsewhere in the house.
The most important rule for drawers: if something doesn’t belong in that drawer’s category, it doesn’t go in the drawer. It goes somewhere else, even if somewhere else is a temporary pile on the counter while you figure out where it actually belongs.
Protecting the drawer’s integrity from the start is far easier than reorganizing it every few months.
Can Minimalism Actually Work in a Small Kitchen?
Yes, but not in the way most minimalism content presents it.
The version of kitchen minimalism that works in a small apartment isn’t about having twelve items and a single pan. It’s about having exactly what you need and nothing beyond that. That line is different for everyone based on how you cook, what you eat, and how your household works.
A family that cooks elaborate meals every night needs more tools and more food storage than a single person who eats simply.
Minimalism in that context doesn’t mean having fewer pots than you actually cook with. It means not having pots you never use alongside the ones you do.
The practical application is this: after decluttering, live with what you kept for three to four weeks. Notice what you reach for constantly and what you don’t reach for at all.
Things you never reach for in a month of normal life can go. Things you reach for constantly should be the most accessible items in the kitchen.
That process, repeated over time, produces a kitchen that’s genuinely minimal for how you actually live, not minimal according to someone else’s standard.
How Do You Keep Your Kitchen Organized With Daily Habits?
The most important daily habit is resetting the kitchen after each meal. Not a deep clean, just a reset. Dishes get washed or loaded, used items go back where they belong, and the counter returns to a clear baseline.
This takes five to ten minutes and stops clutter from building up into something overwhelming within days.
- Reset the kitchen after every meal, so the mess never compounds
- Return every item to its designated spot immediately after use
- Keep countertops clear by bringing them back to a neutral state daily
- Treat this as a quick reset, not a full cleaning session
A second habit that matters is the “one in, one out” rule. Every new tool or appliance replacing something else keeps your kitchen from slowly filling up again.
- Apply the one in, one out rule to control long-term clutter
- Be intentional when restocking groceries instead of placing items randomly
- Return food to its assigned zones in the pantry or fridge
- Maintain the system daily so it doesn’t collapse over time
How Long Does It Take to Organize a Small Kitchen?
Here’s the honest answer: if you do it right, it takes about four to six hours of total effort. That includes decluttering first, organizing by zones, and making real decisions about what stays. Not in one sitting. It’s usually spread across a few focused 30–60 minute sessions over several days.
The initial decluttering alone takes around one to two hours. After that, organizing each zone separately adds another two to three hours, depending on how messy things are.
Setting up storage solutions, whether simple or bought, takes roughly one more hour.
- Total time is usually 4 to 6 hours when done properly
- Work is more effective when split into short, focused sessions
- Decluttering is the first and most important step
- Each kitchen zone should be organized separately, not all at once
- Storage setup comes last, after decisions are already made
The reason it feels longer is simple. Most people skip decluttering and try to organize everything at the same time. They open every cabinet, get overwhelmed, and start putting things back randomly just to finish faster.
Done in stages, the process stays controlled and predictable. A small kitchen becomes a manageable project instead of a stressful overhaul.
And the result is practical: everything has a place, you stop wasting time searching, and cooking becomes noticeably easier.
Conclusion
A small apartment kitchen feels impossible to organize because most people follow the wrong sequence. They try to fit everything in before deciding what actually belongs there. They buy storage before understanding what needs storing. They fix surfaces but ignore what’s clogging the cabinets.
The right approach is simpler. First, reduce what you own to what truly belongs in your kitchen. Then organize it based on where it’s used. Use the vertical and door space you’ve been ignoring. Build a couple of daily habits to keep things from slipping back.
No fancy containers. No renovation. Just clear decisions and a system that makes sense.
Start with the cabinet that annoys you most. Empty it, reset it properly, then move to the next. Small kitchens respond fast when you do this right, and once they do, the way you use your kitchen changes.
Frequently Asked Questions
How do you organize a small apartment kitchen on a budget?
Start by decluttering before buying anything. Remove expired food, duplicate tools, and unused appliances. Then use what you already own, such as shoeboxes as cabinet dividers, tension rods under the sink, and baking dishes to store trays vertically. Only buy storage products after identifying a specific gap that free solutions cannot fill.
How do you maximize storage in a small kitchen with no pantry?
Create pantry space outside the kitchen using a freestanding shelf in a hallway or dining room corner. Inside the kitchen, designate one cabinet exclusively for food organized by category. Use over-the-door organizers on cabinet doors for spices, snack bags, and foil boxes without taking any floor or wall space.
What should stay on the kitchen counter in a small apartment?
Only items used every single day earn counter space. A daily coffee maker and toaster qualify. A blender used twice a week does not. Ask yourself, if this were in a cabinet, would I miss it enough to retrieve it? If the honest answer is no, it does not belong on the counter.
How long does it take to organize a small kitchen properly?
Done correctly, it takes four to six hours of total effort spread across several short, focused sessions. The initial declutter takes one to two hours. Organizing each zone takes another two to three hours. Setting up storage solutions takes roughly one more hour. Never try to do it all in one sitting.
What are the most common small kitchen organization mistakes?
The most common mistakes are buying organizers before decluttering, organizing by category instead of by where items are used, keeping appliances on the counter out of habit, and ignoring the space inside cabinet doors and above cabinets. Trying to organize everything in one exhausting session is also a frequent mistake that leads to things being put back randomly.