How to Organize Under the Kitchen Sink in 15 Easy Steps
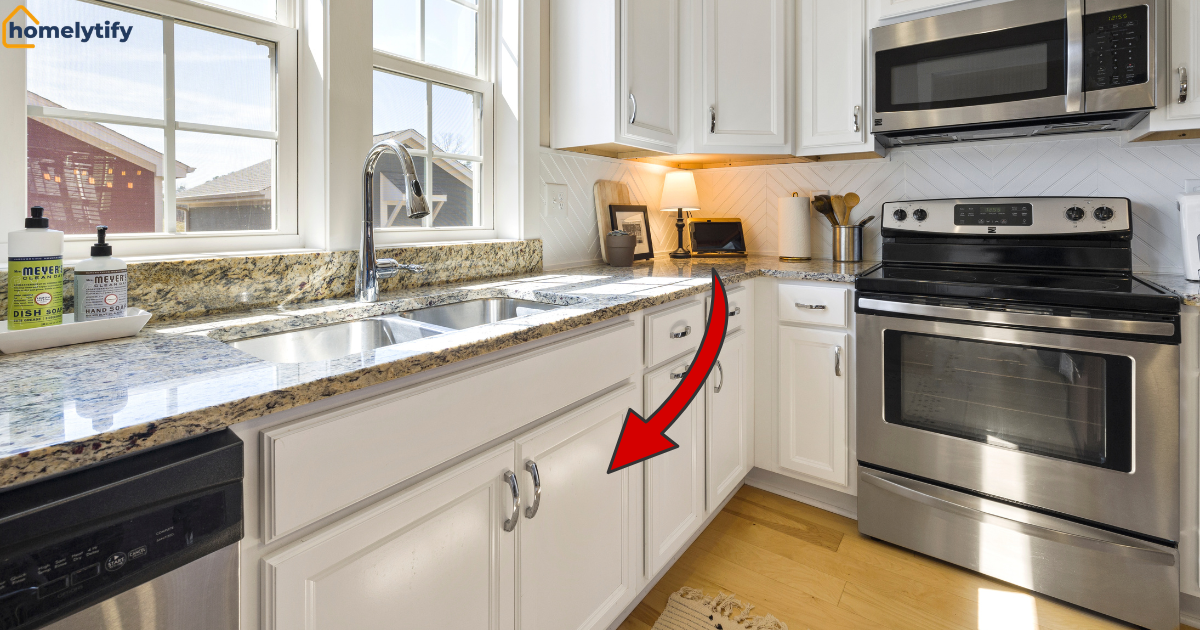
Open that cabinet under your kitchen sink right now, and I’ll bet you find at least one leaking bottle, a tangle of plastic bags, and a sponge you forgot you owned. You’re not alone. This is probably the most chaotic square foot of real estate in the entire house.
Learning how to organize under the kitchen sink isn’t about buying a Pinterest-worthy set of bins — it’s about working around pipes, moisture, and limited space so you can actually find your dish soap without digging.
By the end of this guide, you’ll have a system that stays organized even after your third kid or roommate rummages through it looking for the drain cleaner.
Why the Space Under Your Kitchen Sink Gets Messy So Fast
This cabinet gets treated like a junk drawer with a door on it. It’s dark, it’s an awkward shape because of the plumbing, and it’s usually the closest spot to the sink, so anything cleaning-related gets shoved in there without a second thought.
There’s also a physical problem most people don’t think about: the pipes cut the usable space roughly in half, leaving two oddly shaped side pockets instead of one clean rectangle.
Standard bins don’t fit that shape, so people either buy the wrong organizers or just give up and stack things loosely. Add in the occasional drip from a loose P-trap fitting, and you’ve got the perfect setup for mildew, warped cardboard boxes, and a cabinet nobody wants to open.
I learned this the hard way after installing a water filter system under my own sink. The tank took up almost half the cabinet, and the wide trash bin I’d been using no longer fit comfortably. Every time I reached in to change the filter, the bin got in the way.
Replacing it with a slim, tall bin that fits beside the tank instead of in front of it solved the problem. That experience taught me that organizing under the sink isn’t about choosing the biggest storage container. It’s about choosing one that fits around what’s already there.
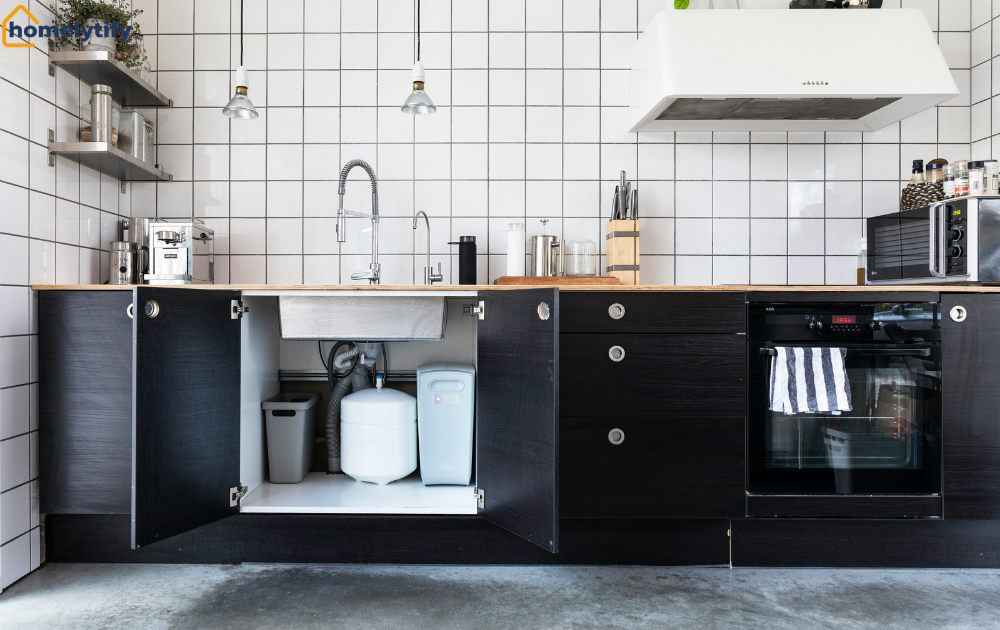
Before you buy any organizers, take a good look at what’s already inside your cabinet. Pipes, garbage disposals, water filters, and shut-off valves all reduce the usable space. Once you know what you’re working around, it’s much easier to choose storage that actually fits.
What You’ll Need Before You Start
You don’t need a shopping cart full of matching containers to fix this. A few flexible, inexpensive pieces will do more work than one expensive all-in-one system.
Here’s what actually helps: a small tape measure, a trash bag for expired products, all-purpose cleaner, a shallow waterproof tray or liner, one or two stackable bins, a lazy Susan or turntable, and either tension rods or adhesive hooks for the cabinet door. That’s it. Most of this runs under $30 total if you shop at a dollar store or use containers you already have.
How to Organize Under the Kitchen Sink in 15 Easy Steps
Follow these in order. Skipping the early steps (especially the purge) is where most people go wrong and end up organizing clutter instead of getting rid of it.
- Take everything out — every bottle, box, and stray glove. You can’t organize a cabinet with half its contents still sitting in the way.
- Sort into three piles. Keep, toss, and “doesn’t belong here.” Bathroom-only products and random tools go back to their real home.
- Check expiration dates. Bleach loses effectiveness after about six months once opened, and a lot of sprays separate or lose their punch after a year or two.
- Wipe down the entire cabinet floor and walls. Use warm water and a mild cleaner, then let it air dry completely before putting anything back — trapped moisture is what causes that musty smell.
- Inspect for leaks or soft spots in the wood. Press gently on the floor of the cabinet. If it feels soft or discolored, deal with that repair before you reload the space.
- Measure the space, including the gap around the pipes. Write down the width on each side of the plumbing separately — most people measure the whole cabinet as one number and then buy a bin that doesn’t fit around the pipe.
- Add a waterproof liner or tray to the base. This catches drips before they soak into the wood and makes cleanup a five-minute wipe instead of a scrub-and-repaint job.
- Install a shelf riser or small wire rack. This is the single biggest space-saver here — it doubles your usable surface by stacking short items under taller ones instead of side by side.
- Use a turntable for bottles and sprays. Instead of pulling everything out to reach the bottle in the back corner, you spin it forward. This is especially useful in the deep corners the pipes create.
- Group items by category into bins. One bin for dish-related supplies, one for general cleaners, one for trash bags and liners. Grouping beats lining everything up loose — you grab the whole bin instead of hunting item by item.
- Put a small caddy or bin near the front for daily-use items. Dish soap, sponge, and hand soap refill should be the first thing you touch, not buried behind the toilet bowl cleaner you use twice a year.
- Use the inside of the cabinet door. An over-the-door organizer holds a small trash bag dispenser or a spray bottle rack without taking up any floor space.
- Store heavy or bulky items — like a trash can or bulk paper towel packs — on the floor, off to the side of the pipes, not stacked on shelving that isn’t rated for the weight.
- Label bins and shelves, especially if more than one person in the house uses this cabinet. A five-second glance beats opening three bins to find the glass cleaner.
- Do a final walkthrough and close the door. If it closes easily without anything jammed against it, you’re done. If you have to shove the door shut, something needs to come out — this cabinet should never be a squeeze.
Renter-Friendly Ideas That Won’t Damage Your Cabinet
If you’re renting, you probably don’t want to drill anything or leave marks that show up during a move-out inspection. This is where most guides fall short, because half their suggestions assume you own the place.
Command strips and tension rods are your best friends here. A tension rod mounted a few inches up from the cabinet floor lets you hang spray bottles by their necks without a single screw.
Adhesive hooks work the same way for gloves or a small scrub brush. For flooring protection, skip the peel-and-stick shelf liner with adhesive backing — use a plain rubber or cork mat instead, since it grips without sticking and comes out clean when you move. None of this needs a deposit-risking drill.
How to Keep Cleaning Supplies Safe Under the Sink
This part gets skipped in almost every under-sink organization article, and it shouldn’t. If you have kids, pets, or even just a curious toddler who visits on weekends, safety needs to be part of the plan, not an afterthought.
The simplest fix is a childproof cabinet lock — the kind with a magnetic key or a simple strap catch runs about $10 for a two-pack and takes two minutes to install. Beyond that, never store cleaning products in anything other than their original, labeled containers.
It’s tempting to decant bleach into a pretty spray bottle for a cleaner look, but an unlabeled bottle is a poison control call waiting to happen. Keep chemicals that shouldn’t mix, bleach and ammonia-based cleaners, for example, on opposite sides of the cabinet, not stacked together.
This isn’t a small-scale worry, either. In the most recent national poison center data, household cleaning substances remain one of the top five most common exposures reported for children aged five and under, right alongside cosmetics and pain medication. That’s exactly why original containers and a childproof lock matter more than how tidy the shelf looks.
Common Mistakes People Make When Organizing Under the Sink
Here’s where most people get stuck, even after watching a dozen organization videos.
- Buying bins before measuring. The pipes eat more space than you think, and a bin that looked perfect online often won’t clear the trap. Measure first, buy second.
- Overbuying storage products. A drawer full of empty organizers doesn’t solve clutter — it just moves the clutter into fancier containers. Purge before you shop.
- Ignoring moisture. People organize a wet cabinet and wonder why mildew shows up two months later. Always let it dry completely first, and check for slow leaks every few months.
- Storing heavy items on flimsy shelf risers. Wire risers aren’t built for a gallon jug of laundry detergent. Keep the heavy stuff on the actual cabinet floor.
- Treating it as one big space instead of two smaller ones. This is where things usually fall apart — the pipe splits the cabinet into two zones, and trying to use it as one continuous shelf wastes the corners on both sides.
How Often Should You Redo Your Under-Sink Storage?
You don’t need a monthly overhaul, but a quick check every three to four months keeps things from sliding back into chaos. Pull everything out once a season, toss what’s expired, and wipe the base dry. If you notice the door struggling to close or products piling up loose again, that’s your sign it’s time for a mini reset — not a full redo, just steps 1 through 4 again.
Conclusion
Under-sink chaos isn’t really about needing more storage; it’s about working with an awkward, damp, pipe-filled space instead of against it. Once you purge what doesn’t belong, protect the base from moisture, and group what’s left by how often you actually use it, this cabinet stops being the one you dread opening.
Grab a trash bag and give it twenty minutes today; future-you, digging for the dish soap, will thank you.
Frequently Asked Questions
What’s the best way to organize under a kitchen sink with pipes in the way?
Measure each side of the pipe separately and use narrow bins or a pull-out caddy sized for each pocket instead of one wide organizer.
Do I need to buy special under-sink organizers?
No. A basic shelf riser, a few stackable bins, and a waterproof tray handle most kitchens without any custom products.
How do I stop my under-sink cabinet from smelling musty?
Dry the cabinet fully before restocking it, add a small box of baking soda, and check for slow leaks every few months.
Is it safe to store cleaning chemicals under the kitchen sink?
Yes, as long as they’re in original labeled containers, kept away from food items, and locked up if kids or pets are in the house.
How do I organize under the sink if I’m renting?
Stick to tension rods, adhesive hooks, and non-adhesive mats — all removable without leaving marks or damaging the cabinet.